RussOgi.com
  • Home
  • Blog
  • 3D Printed Art
  • Other Works
  • In The Media
  • Shows

What Happens When You Mix 3D Printing and Samurai Helmets?

6/27/2015

5 Comments

 
Picture
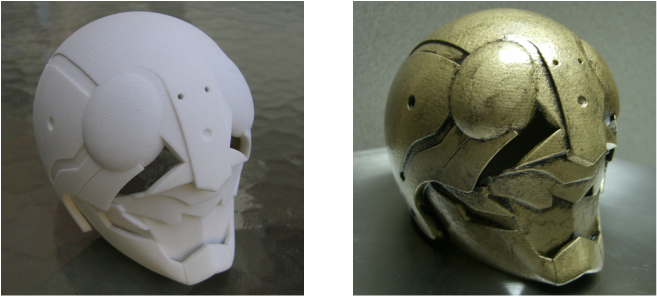
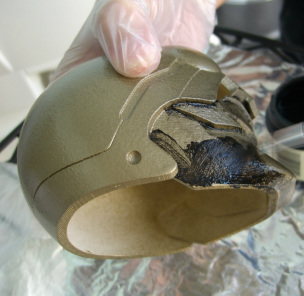
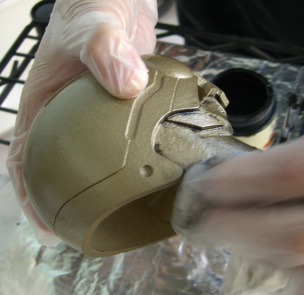
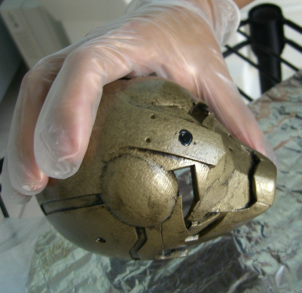
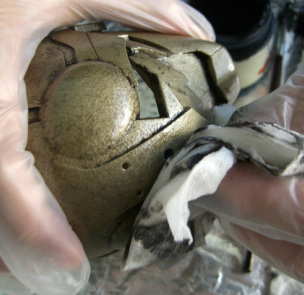
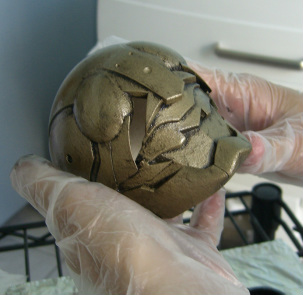
If you've seen my gallery, then you know what I think happens when you mix modern technology and Japanese Samurai helmets also known as kabuto.

Well, the recent Kabuto Design Challenge sponsored by Modelab and i.materialise Japan asked Japanese designers to create what they thought.  Check out the entries here.

There are some pretty amazing entries, and I had the honor of being one of the judges to select the best of the best. 

I was really amazed at the creativity.  Some were dramatic in their design while others were deeply symbolic.  For some, the explanations really brought the concepts to life.

If you can't read Japanese, try Google Translate.  Good enough most of the time.  If you don't want to read, just look at the pictures.

I can't say too much about the entries since the winners haven't been announced yet.  Look for the results coming up next month.

I'd like to know what you think.  Please post your thoughts on the entries in the comments section.  And, if you've ever designed or re-imagined armor - Japanese, European, Spanish etc. I would love to see and hear about your designs.
5 Comments

Too New?  Make It Old.

6/24/2015

0 Comments

 
What do you do when you have a 3D print and you don't want it too look like it's fresh out of the printer?  If it's non metallic you can use a process called antiquing.  I've used variations of this process on many of my 3D printed pieces.  If done properly, it can add a lot of character to your model and highlight details.

In this posting, I'll go through the basic method of antiquing using easy to acquire materials.  We'll start with your bare print and end up with the antiqued piece.

Kamen Rider before and after
The image on the left is the bare print made from what's commonly referred to as the sandstone material. The image on the right is what we'll end up with.

Supplies needed:

Latex or nitrile gloves or similar
Scouring pad (optional)
Paint brush or sponge brush
Damp paper towels
Covered work surface
Gold base coat (or other colors)
Black or grey water based paint (must be water based)
Clear coat (optional)

Base coat
Same model after the gold hammerd metal base coat.


1) Spray 3D print with base coat color ensuring an even, consistent coat of paint. Allow time for adequate drying often 24 hrs for full cure. Follow recommended safety instructions and dry time as per the manufacturer's product label.

2) (optional) If your model has a lot of flat open areas you can use the scouring pad to distress the surface.  The antiquing paint get caught in the fine scratches left by the scouring pad and give the flat areas texture.  You can be creative and also use this technique for weathering effects. 

3) Prepare a covered work surface and have several sheets of damp paper towels. Half sheets work well. The number of sheets will vary according to size of project and level of detail. Use latex gloves to keep your hands clean. This process can get messy. It largely depends on the complexity of the project.

supplies
Foil covered work area and supplies.


4) Mix antiquing paint well. Follow manufacturer's label for mixing and safety instructions.  For this blog post, I'll be using black paint.  However, depending on the look you're going for, the paint could be different shades of black, grey, brown or green especially if you're trying to mimic a patina on a metallic surface. 

American Accents black paint
Bottled Rust-oleum black paint.


5) Begin brushing or sponging on the antiquing (black paint) coat in roughly one inch square areas. It may be possible to work larger areas again, depending on surface area, detail etc. Immediately wipe off the excess paint leaving the antiquing coat in the corners and recesses of the model. The main goal is not to cover too much area at one time. If the excess paint dries, it becomes permanent.

brush on black paint
Black paint brushed on a small flat area. If applied to to large of an area at one time, the paint may begin to dry.
wiping off excess black paint
Wipe off the excess paint with a damp paper towel. As you can see the majority of the black paint is removed leaving black in only the crevices.
reapplying black paint
Some shallow or deep recesses may require re-application of the antiquing paint to get proper coverage.
remove excess paint
Removal of the excess paint with a damp paper towel.


6) Allow the remaining antique coat to dry. Apply a clear coat as an optional step.

finished piece
Model after the antiquing is finished.
If you have any tips for antiquing please feel free to share them in the comments section or if you have tried the technique, I would love to see your results and the sort of projects you're working on.
0 Comments

Are You On The Outside?

6/16/2015

0 Comments

 
London Window
Just about everyone feels like they don't belong at some point in their life.   Well, earlier this year, while showing some of my pieces at the 3D Printer World Expo, I found out how much of an outsider I really was.

Just after the Expo ended, I had the chance to sit down with some of my fellow digital and traditional artists from the show.  Everyone introduced themselves and what digital tools they use to create their 3D models.  Going around the group, everyone mentioned NURBS and how difficult it was.  In fact, everyone seemed to have a NURBS horror story.

I was last.  I gave my name and said I was a NURBS modeler.  That got a laugh from the group.  Then it went silent.  And somebody said, "seriously?"  I said, "yeah".

Out of a group of 15 artists, I was the only one who didn't hate NURBS.  Not only that, I use NURBS as my primary modeling tool...almost exclusively.

I am self taught. I got started from manuals and, back then (about 18+ years ago), books.  The software and hardware was very specialized and in most cases, very expensive. Not much of a consumer and hobbyist market.

Because I am self taught, the way I do things is unconventional. This has been both blessing and curse. I needed to learn as I went so, a lot of how I work feels like workarounds. 

On the other hand, it's led me to a pretty unique build and unique designs.  It has pushed me to look outside the box for ideas and inspiration, even in other areas of my life.  I believe this is at least part of what draws attention to my work.

Long before my fateful artist roundtable in Burbank, I would have discussions with one of my colleagues about NUBRS and Polygons.  He is a former Art Director for a major video game company, who now teaches 3D modeling and runs his own software company.  He is partly self taught and partly classroom taught.

I gained a lot of insight into the world of polygon modeling and designing for video games from him.  I also see the differences (advantages and pitfalls) between being classroom and self taught.

Always being one to constantly learn.  I have been interested in expanding my 3D modeling tool set to include more polygon modeling skills. 

I'm not planning on changing my primary build style and tools.  But the more diverse your are, the better you can adapt to any situation.

Would like to hear any thoughts you have about NURBS vs. Polygon or any thoughts you have about self taught vs. classroom taught.

0 Comments
    Picture

    RSS Feed

    Author

    Based in Las Vegas but originally from Hawaii, Russ Ogi is a mixed media artist.  His background and passion are in photography and traditional sculpture.

    Raised in a crossroad of cultures, he grew up with Eastern and Western influences. His art reflects that unique fusion of aesthetics and traditions.

    Sculpting in Autodesk Maya, Russ 3D prints his digital model in a variety of media from plaster and plastics to metal.

    From here, his prints often undergo meticulous handcrafting. He often utilizes custom finishing techniques to further instill a feel or emotion into a piece.  

    With almost 20 years of experience in the high-tech industry, and his background in Additive Manufacturing, Russ has also served as a consultant for numerous financial, safety and product development organizations internationally. 

    Among some of his notable clients are the Hawaii State Department of Education, the Joint POW/MIA Accounting Command (JPAC currently DPAA) and the New York Office of the Chief Medical Examiner.

    He has been a sponsored or featured artist with companies such as Autodesk, imaterialise, 3D Fuel  and, LulzBot.

    Archives

    April 2021
    March 2021
    March 2019
    February 2019
    January 2019
    November 2018
    June 2018
    March 2018
    January 2018
    October 2017
    August 2017
    July 2017
    June 2017
    May 2017
    June 2016
    May 2016
    December 2015
    November 2015
    October 2015
    September 2015
    August 2015
    July 2015
    June 2015
    May 2015
    April 2015

    Categories

    All
    3d Printing
    Armor
    Art
    Blockchain
    Cinema
    Educational
    Exhibitions
    Half Scale Samruai Armor Build
    Half-scale Samruai Armor Build
    Personal
    Samurai
    Technology

    RSS Feed

Copyright Russ Ogi 2024

Web Hosting by iPage